Hi Everyone,
Rebekah and I are attending a seminar at Sydney Uni on Tuesday so we will have our Digital Fab Lab open hours on Monday 31/3 from 9:30 - 5:00. I may be at the DFL on Tuesday afternoon if the seminar doesn't go on too long. Apologies for the change of plans.
Eliot
Saturday 29 March 2014
Wednesday 26 March 2014
Lecture Video
Hi everyone,
Here is a link to the video recordings of Wednesday morning lectures: Wednesday Lectures
Here is a link to the video recordings of Wednesday morning lectures: Wednesday Lectures
Sunday 23 March 2014
IMPORTANT!!! - DUE DATES & FABRICATION LAB ACCESS
DUE DATES:
TASK 1 - WED 2 APR
TASK 2 - WED 2 APR
TASK 3 - WED 23 APR
TASK 4 - WED 7 MAY
TASK 5 - WED 21 MAY
TASK 6 - WED 11 JUN
A reminder that student lab access at this stage requires either myself or Eliot to be available for supervision as part of your induction process.
*** Your models for tasks 1 and 2 are due NEXT WEEK 2Apr.
*** Note that at this stage we are only scheduled to supervise until this Friday (see previous post: Important Dates)
*** ANOTHER OPTION: for you is to outsource your lasercutting or 3D printing job elsewhere if you're unable to make use of our availability during the times set out to ensure you're able to submit your models by 2 April.
Bear in mind there could be backlog as 3D printing may take a while, so the earlier the better. Good luck!
***** Also, please ensure you check this blog regularly as you've been informed that this will serve as our means of communication
Final OH&S training
Hi Everyone,
Can anyone who has not yet done the OH&S training on the laser cutters and 3D printers please reply to this post with your name, student number and days that you are available to do it.
Can anyone who has not yet done the OH&S training on the laser cutters and 3D printers please reply to this post with your name, student number and days that you are available to do it.
Tuesday 18 March 2014
This Weeks Exercise
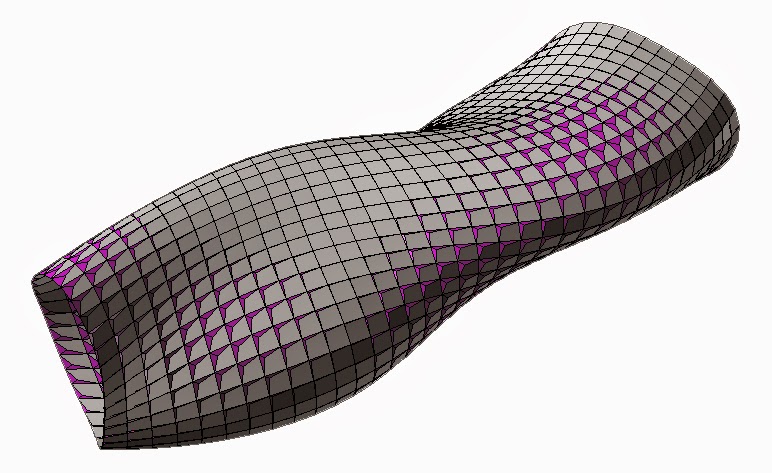
In this tutorial you will be working on creating a surface with repetitive elements that will respond to one or more attractor points. You will apply a grid to your surface and fit a variable parametric element to the surface that will change depending on each elements distance from the attractor point.
Good luck!
Wednesday 12 March 2014
IMPORTANT DATES
OH&S training & EQUIPMENT DEMONSTRATON
14 Mar FRI 9.30-11.30 (session 3)
17 Mar MON 9.00-11.00 (session 4)
DIG FAB LAB AVAIL (equipment use under supervision)
17 Mar MON 12pm - 5.00
18 Mar TUE 9.00 - 5.00
19 Mar WED 3.00 - 5.00
20 Mar THU 9.00 - 5.00
24 Mar MON 9.00 - 5.00
25 Mar TUE 9.00 - 5.00
26 Mar WED 3.00 - 5.00
27 Mar THU 9.00 - 5.00
28 Mar FRI 9.00 - 5.00
TASK 1 - DUE DATES
19 Mar - Final working GH script and individual blogs
2 Apr - Task 1 lasercut model together with Task 2 deliverables
Email Addresses
Hi Guys. Here are our email addresses in case you want to contact us directly:
Eliot: e.rosenberg@unsw.edu.au
Rebekah: r.araullo@unswalumni.com
Eliot: e.rosenberg@unsw.edu.au
Rebekah: r.araullo@unswalumni.com
SAMPLE DEFINITION FOR SECTIONING
Here's a simple way to section your geometry for lasercutting. Analyse and think about this process and adapt it for your use.
*****you now have a basic script for sectioning and orienting geometry for lasercutting

*****you now have a basic script for sectioning and orienting geometry for lasercutting
SECTIONING
As a follow-on from this week's tutorial, here are Task 1 samples of solid geometry created purely in GH and suitable for sectioning.
Do your own research on different ways to alter or manipulate your geometry (grasshopper3D forum is a great place to start)
Analyse the geometry and breakdown the possible strategies to accomplish your desired outcome

Do your own research on different ways to alter or manipulate your geometry (grasshopper3D forum is a great place to start)
Analyse the geometry and breakdown the possible strategies to accomplish your desired outcome
Wednesday 5 March 2014
TASK 1 SAMPLE SCRIPT
For Task1, think laterally....
Here's another way of manipulating a simple box geometry to arrive at the letter H
(We had discussed this in class with the letter L - use 2PT box component under Surface tab, Primitive menu)
Extend and play around with your exercise scripts. (Show us interesting forms next wk! and document your processes in your individual blogs- w/c contributes to your overall mark)
Develop your Task 1 geometry (aim to come to tut next wk with a near resolved geom so we can focus on preparing surfaces for lasercutting)
***Do not hesitate to ask questions - email or comment!
***Try not to miss any tutorials so you don't fall behind
***Prepare to experiment!
Monday 3 March 2014
Tutorial 1 - 5.3.2014
Students: You will work through the following exercises during the 2 hour tutorial. Exercise 6 below is the beginning of an assignment that you will work on this week and next week.
Exercise 1: Points and Lines
Draw some points in Rhino. Assign points to grasshopper
point component. Draw lines between points with Line AB component.
Exercise 2: Slider
Draw a circle in Grasshopper. Control the radius with a
slider
Exercise 3: Division & Multiplication
Draw a rectangle in Grasshopper. Control the length of one
parallel set of edges with a slider. Set the length of the other parallel set
of edges as a ratio of the length of the slider controlled edges.
Exercise 4: Divide a Curve
Draw a curve. Divide the curve into an amount of sections
defined by a slider. Place a sphere at each division point.
Exercise 5: Loft Curves
Draw two curves in Rhino and loft them in Grasshopper. Move
the control points of these curves in Rhino and see how the loft responds.
Exercise 6: Assignment 1, part 1
Create a 3D representation of your first initial. Be
creative! J
The outcome of this exercise will be developed further in
next week’s tutorial.
Exercise 7: Play!
If you finish the other exercises, just explore and play and see what you can make in Grasshopper.
If you finish the other exercises, just explore and play and see what you can make in Grasshopper.
Sunday 2 March 2014
Introduction to Parametric Modelling with Grasshopper
Traditional 3D modelling programs allow us to create 3D
objects with tools that somewhat simulate how one might sculpt them in the real
world to a high degree of accuracy. We start by creating simple shapes, and by
using variety of commands are able to carve and mould these shapes into more
complex objects. Designers work from briefs that state specific requirements
and conditions to which designs must adhere and respond. The design process can
be a lengthy exercise of product reworking in order to satisfy a variety of
changing conditions (budget, legal, clients, materials, fabrication
limitations, etc). As a result of these changes it is sometimes necessary to
restart a design from scratch, delete and add parts to the design, or go back
to an earlier version and continue from there. This process of reworking can be
extremely time consuming.
But what if instead of going through this manual process of
3D drawing, we could automate it and give our designs the ability to respond to
these changing factors? Parametric modelling allows us to automate the 3D
modelling process and provides the designer with the power to simply generate infinite
design variations. This is because when we design with parametric modelling software
such as Grasshopper we give the 3D program a set of instructions (called a
script) where each design step performed on an object is dependant on other
steps in the process. This means that we can revisit the script we have
produced, change part of it, and all the steps that are dependent on the part
we changed will adjust themselves in response to the change.
For example, we may use a traditional method of modelling to
draw three circles next to one another where the first one is double the size
of the second one, and the third one is double the size of the second one. If
the size ratio conditions change and we have to make the first one three times
the size of the second one, and the second one three times the size of the
third one, we would have to redraw at least the second and third circles to
comply. With parametric modelling tools we are able to change one number value
that represents the dependency of the circles size in relation to the previous
circle in the group. By changing this one value the drawing will automatically
adjust and the circles will redraw themselves to fit the new conditions. This
simple example applies to the most complex objects and conditions we create in
the parametric modelling environment.
In addition to being able to create highly adaptable
designs, another advantage of parametric modelling is that it enables us to
create very complex designs with mathematical properties that would be
otherwise near impossible to devise. You will see examples of this type of
complex geometry in architecture in Hank’s lectures.
Grasshopper is a plugin for the Rhinoceros 3D modelling
environment which uses the built-in Rhino commands for parametric design in a visual
programming workspace. It is generally used in combination with the regular
Rhino environment to achieve the desired results. There are several programs
like Grasshopper that allow users to take advantage of the power of parametric
modelling in various modelling software environments, such as AutoDesk (Revit,
Vasari, Dynamo) and Microstation (Generative Components).
Before
our first tutorial class on Wednesday 5/3:
- Read the first two pdf’s linked to the tutorial page of this website: http://parametri.dk/tutorials/. This will give you a basic understanding of the Grasshopper environment.
- Sign up to the Grasshopper 3D forum: http://www.grasshopper3d.com/main/authorization/signUp?
- Check out Digital Toolbox http://digitaltoolbox.info. It is another great tutorial resource.
- Have a look at the official Grasshopper 3D Primer: http://www.liftarchitects.com/blog/2009/3/25/grasshopper-primer-english-edition
We
will post more links to tutorial sites on this blog soon, and you can also find
tutorials or forum posts that answer many questions you have about Grasshopper.
Google is your friend :)
Remember: If you don’t understand what you’ve just
read in the links above, don’t worry! That’s what your tutors are here for. The
concepts may be a little different to what you’re used to and difficult to
understand in the beginning, but once it clicks it will become a lot of fun.

Subscribe to:
Posts (Atom)